- Home
- Digital Light Projection
- Surface finish and colour in consumer product prototypes: what’s achievable and how to specify it
Surface finish and colour in consumer product prototypes: what's achievable and how to specify it
In most engineering sectors, surface finish is a secondary consideration. In consumer products, it’s often the primary one. A prototype that looks rough, inconsistent or visibly unfinished can undermine the product’s credibility at exactly the moments that matter most – investor presentations, retail buyer meetings, user testing sessions, trade shows.
The good news is that the range of finishing options available for 3D printed and vacuum cast prototypes is much broader than many product teams realise. The challenge is knowing what is achievable from each process, what the correct way to specify it’s, and what to expect in terms of lead time and cost.
This guide covers the main finishing options available at Prototype Projects for consumer product prototypes, process by process, with practical guidance on how to specify them and what they are best suited to.
Why finish specification matters from the start
The most common finishing-related problem in prototype production is not that the finish is unachievable – it’s that it was not specified clearly enough at the quoting stage, which means either the wrong finish is applied or the job needs to go back into the queue for rework.
A few principles that help avoid this:
Specify the finish you need, not the finish you assume is standard
Different suppliers have different defaults. At Prototype Projects, the finish level is selected at the quoting stage from a defined list, so the team knows exactly what is expected before the job starts.
Distinguish between the A surface and the B surface
The A surface is the visible, primary surface – the side the user sees. The B surface is the secondary surface, typically internal or hidden. Most finishing operations are applied to the A surface only, which affects both cost and the options available.
Consider finish requirements when designing the part
Some finishing options – rubberised coating over a painted surface, for example – add material thickness. On parts with tight assembly interfaces, this can affect fit. It’s worth discussing finish requirements with the prototyping team before finalising the design.
Lead time implications vary by finish level
Basic cleaning and support removal can be done within a standard production schedule. Detailed paint, lacquer and multi-stage finishing adds time. If the deadline is tight, it’s worth asking about finish lead times at the quoting stage rather than assuming they are included in the standard build time.
SLA: the broadest finishing options
SLA parts take finishing better than any other 3D printing process, which is one of the main reasons SLA is the default choice for consumer product presentation models. The resin surface can be sanded, primed, painted, lacquered and coated, and the dimensional accuracy of the build means that finishing work does not need to compensate for underlying geometry issues.
Support witness marks removed (B2)
Support witness marks on the A surface are removed, and the surface is left ready for further finishing. The standard starting point before paint or lacquer.
Bead blast (B3)
Support witness marks removed on the A surface followed by a light bead blast to even out the surface texture. Gives a consistent matt appearance and is a good base for paint.
Clear lacquer (B4)
Support witness marks removed and a coat of clear lacquer applied. Suitable for parts where the natural resin colour is acceptable and a sealed, consistent surface is needed.
Lacquer to seal surfaces (B7)
Lacquer applied to seal the full surface of the part. A B2 or B6 finish is applied first. Not available on overnight production speeds.
Paint – primer coat (D1)
Grey or white primer coat applied to the A surface. The standard base for colour painting. Parts at this stage are ready for colour coat if additional work is being done externally, or can be delivered at primer stage for client-side painting.
Paint – colour coat (D2)
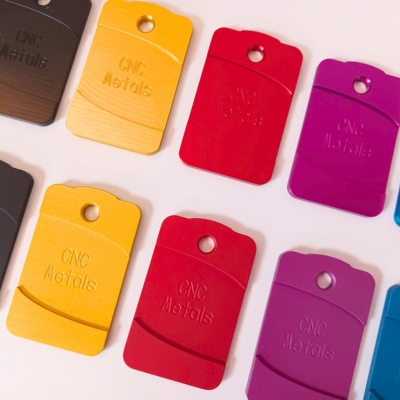
Full paint surface finish applied to the A surface in satin, gloss or textured finish (fine, medium or coarse texture available). Pantone and RAL colour matching available. This is the finish level for presentation models and investor samples where colour accuracy matters.
Lacquer – gloss effect (D3)
Lacquer applied over a painted surface to give a high-gloss effect on the A surface. Used for consumer electronics and premium consumer product prototypes where a gloss finish is part of the product’s visual identity.
Rubberised soft-touch coating (D4)
Applied over a painted A surface to give a tactile, soft-feel finish. Commonly used for consumer electronics casings, handheld device grips and any consumer product where a premium soft-touch feel is part of the user experience. The coating adds a small amount of material thickness, which is worth accounting for on parts with tight assembly interfaces.
SLA surfacing (S1)
Build lines removed, and surfaces smoothed across the part, followed by a light bead blast. For parts where a cleaner, more production-representative surface is needed before painting or lacquering.
Clarity lacquer for clear SLA (D7)
For parts built in Accura ClearVue, a lacquer is applied to maximise optical clarity. Used for lenses, light pipes, transparent windows and decorative clear components. Geometry-specific – not all part geometries are suitable.
Blackout / RFI / EMC coating (D8)
Applied to internal B surfaces. Used for consumer electronics enclosures where electromagnetic compatibility is a consideration at the prototype stage.
Vacuum metallising
A mirror-finish metallic coating applied to SLA parts. Used for decorative chrome-effect components, metallic trim details and premium consumer product parts where a metallic appearance is required without the cost of machining from metal billet. Enquire at the quoting stage for availability and lead time.
SLS: dyeing and lacquering for coloured functional parts
SLS nylon parts cannot be painted in the same way as SLA – the sintered surface is more porous and does not provide the same base for a paint system. The finishing route for SLS is dyeing, which penetrates the material to give a consistent colour throughout the part, rather than a surface coating.
SLS cleaning (B6)
The standard finish for SLS parts – excess powder removed, part cleaned and inspected. Suitable for functional test parts and internal components where appearance is secondary.
SLS dyeing (D5)
Parts are dyed in a colour bath to give consistent colour throughout the material. Black is available as standard, but a full range of colours is available via one of our trusted suppliers. Dyeing does not significantly affect surface texture – the part retains its as-sintered nylon texture – but gives a consistent, presentable appearance suitable for user testing samples and product review models.
Lacquer over dyed SLS
A lacquer coat can be applied over a dyed SLS part to seal the surface and give a slightly more refined appearance. This is the best finish level achievable on SLS for presentation purposes – approaching, though not quite matching, the finish quality of painted SLA.
Vapour smoothing (D10)
A chemical smoothing process that reduces the surface roughness of SLS parts significantly, producing a smoother, more consistent surface than standard SLS finishing. Suitable for consumer product parts where a cleaner surface is needed without switching to SLA.
DLP: similar options to SLA, with material-specific considerations
DLP parts share many of the same finishing options as SLA – support removal, paint, lacquer and coating are all available. The starting surface quality varies with the material and build orientation, and visible layer lines in certain orientations may require additional surface preparation before painting.
For flexible DLP materials, paint and lacquer options are more limited – flexible coatings are available, but the range is narrower than for rigid parts. If a flexible part needs a specific surface finish, it’s worth discussing this at the quoting stage before the job is committed.
Vacuum cast parts: colour in the material
Vacuum cast polyurethane parts offer a different approach to colour – rather than applying colour as a surface coating after the part is made, pigment is mixed into the polyurethane before casting, giving a colour that runs through the material rather than sitting on the surface.
This makes vacuum cast parts particularly robust for user testing and pre-production evaluation – there is no paint layer to chip or scratch during handling, and the colour remains consistent if the part is cut or modified during evaluation.
Colour matching
Polyurethane can be pigmented to match Pantone or RAL colours, though an exact match to a painted SLA part is not always achievable due to the different material base. Where colour consistency between vacuum cast and SLA parts is important – for a pre-production sample set that includes both, for example – it’s worth discussing the colour specification with the team before casting begins.
Self-coloured vs painted vacuum cast parts
For most consumer product applications, self-coloured casting is the preferred approach. Painting vacuum cast parts is possible but less common, as the flexible polyurethane surface does not hold paint as well as rigid SLA resin.
Clear and tinted castings
Polyurethane is available in water-clear grade, suitable for transparent consumer product components. Tinted versions – translucent colours – are also achievable.
Specifying finish correctly: a practical checklist
Before submitting a quote request for a consumer product prototype that requires a specific finish, it helps to have the following clear:
- Which finish level is required (refer to the finish codes listed above, or describe the requirement and ask the team to recommend)
- Which surfaces are the A surfaces – the primary visible surfaces – and which are B surfaces
- Whether colour matching to a Pantone or RAL reference is required, and if so, what the reference is
- Whether the part has assembly interfaces that could be affected by coating thickness
- Whether the finish needs to be consistent across multiple parts – for a user testing set, for example – and if so, how many parts are in the set
- Whether there is a photography or presentation deadline that affects the finish lead time required
Not sure what finish is achievable for your product?
Finishing for consumer product prototypes is one of the areas where a conversation before the quote is placed tends to produce a better result than specifying blind. Our finishing team has worked on a wide range of consumer products and can advise on what is achievable within a given lead time and budget.
Call us on 01763 249760, email office@prototypeprojects.com, or request a quote and include a note on your finish requirements. If you have a reference image or a Pantone reference, include that too.
Related reading
From prototype to low-volume production in industrial ...
20 October 2026 Comments Off on From prototype to low-volume production in industrial automation
Which 3D printing process should you choose?
14 October 2026 Comments Off on Which 3D printing process should you choose?
SLS 3D printing for jigs, fixtures and ...
12 October 2026 Comments Off on SLS 3D printing for jigs, fixtures and robotic grippers
Prototyping for automation and industrial engineering: choosing ...
15 September 2026 Comments Off on Prototyping for automation and industrial engineering: choosing the right manufacturing process
Vacuum casting for consumer products: production-quality parts ...
20 August 2026 Comments Off on Vacuum casting for consumer products: production-quality parts without production tooling

Prototyping for Medical Device Development: Choosing the ...
28 July 2026 Comments Off on Prototyping for Medical Device Development: Choosing the Right Process