


- Home
- Vacuum Casting
- Vacuum Casting for Prototypes: What It Is, How It Works, and When to Use It
Vacuum Casting for Prototypes: What It Is, How It Works, and When to Use It
If you need a small batch of high-quality parts that look and function like injection moulded components, without the cost or lead time of hard tooling, vacuum casting is likely the answer. It’s one of the most versatile and cost-effective processes available to engineers and designers working through the prototype and pre-production stages of product development. This guide walks you through everything you need to know.
What Is Vacuum Casting?
Vacuum casting is a manufacturing process in which liquid polyurethane (PU) resin is poured into a silicone rubber mould under vacuum conditions. The vacuum draws out any trapped air, ensuring that every surface detail is faithfully reproduced and the finished part is free from blemishes or voids.
The result is a high-quality replica of the master pattern, complete with accurate surface finish, fine features such as snap fits, and material properties that correspond closely to engineering plastics or elastomers. It’s quick to set up, repeatable, and capable of producing small quantities of parts that would be uneconomical to injection mould at this stage.
The Vacuum Casting Process: Step by Step
Understanding the process helps you appreciate both what vacuum casting can achieve and why it delivers such consistent results.
Preparing the master pattern
The process starts with a master pattern, typically produced by SLA (stereolithography) 3D printing and hand-finished to a high standard. The surface quality of the master directly determines the surface quality of every cast part, so this stage matters enormously. Casting gates and risers are either added during printing or made separately and attached.
Making the silicone mould
The finished master, complete with gate and risers, is positioned inside a fabricated box. Liquid silicone rubber is poured around it inside a vacuum chamber. The vacuum deaerates the silicone, preventing bubbles from forming on the mould surface. The mould is then heated to cure the silicone fully.
Removing the master and inspecting the mould
Once cured, the mould is carefully cut open, the master pattern removed, and the mould inspected. The silicone captures every detail of the master, including undercuts and complex geometry that would be difficult or impossible to achieve with hard tooling.
Casting the polyurethane
With the mould reassembled and a casting funnel in place, it returns to the vacuum chamber. Liquid polyurethane is poured in, and the vacuum again eliminates trapped air, ensuring full fill of the mould cavity and a blemish-free surface. The mould is then heated to cure the resin.
Demoulding and finishing
Once cooled, the part is removed, the gate and risers are cut away, and the part is inspected. Some parts, particularly those with tighter tolerances or complex geometries, are placed on a curing fixture for up to seven days to maintain their shape. Finishing operations are then carried out as required.
Each silicone mould can typically produce up to 20 to 25 parts before it needs replacing, depending on the material and part geometry, making it an efficient process for small production runs.
Key Benefits of Vacuum Casting
Vacuum casting offers a compelling combination of advantages that make it a staple process in prototype and low-volume manufacturing.
Speed and cost without hard tooling
Creating an injection mould tool is expensive and takes weeks. Vacuum casting uses silicone moulds that can be ready in days, at a fraction of the cost, making it far more accessible when you need tens of parts rather than thousands.
Exceptional part quality
Because the vacuum eliminates air from both the mould and the resin, the finished parts are isotropic, non-porous, and free from internal defects. Surface finish is as good as the master pattern, which, if printed and finished to a high standard, can be production-equivalent.
Material versatility
The range of polyurethane grades available means you can match a wide variety of production materials, from soft elastomers to rigid engineering plastics.
Overmoulding and assembly
Vacuum casting is particularly well-suited to overmoulding: adding an elastomeric layer to a rigid substrate, for example, or encapsulating a metal component. Threaded inserts can be cast in place, and vacuum cast parts can be assembled with other prototype or off-the-shelf components.
Finishing options
Parts can be self-coloured by adding pigments to the resin, painted, textured, or given specialist coatings including blackout, EMI or RFI coatings on internal surfaces. Parts can also be vacuum metallised for a premium finish.
Vacuum Casting Materials: What Can They Simulate?
One of the most significant strengths of vacuum casting is the breadth of material options. Polyurethane resins are available in grades spanning the full spectrum from soft rubber to hard plastic.
Elastomeric grades cover Shore A hardnesses from 25 to 95, making them suitable for seals, gaskets, grips, buttons and flexible housings. They effectively simulate the thermoplastic elastomers (TPE) used in production.
Rigid grades simulate common injection moulding materials including ABS, acetal, polypropylene, unfilled nylon, and glass-filled nylon. These grades offer the stiffness, surface hardness, and thermal resistance you’d expect from their production counterparts.
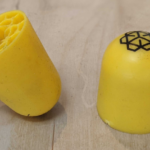
Specialist grades include water-clear resins for transparent parts, fire-retardant formulations for applications with specific safety requirements, and heat-resistant materials for thermal testing.
At Prototype Projects, the maximum casting volume is 1.0 litre, with mould sizes up to 480 mm × 440 mm × 420 mm, accommodating a wide range of part sizes. For parts outside these dimensions, sections can be cast separately and assembled.
When Should You Use Vacuum Casting?
Vacuum casting is suitable across multiple stages of the product development lifecycle.
Concept and visual models benefit from the ability to reproduce fine surface detail and to produce parts in representative colours and finishes. This is particularly useful for stakeholder presentations or marketing photography before production tooling is committed.
Functional test prototypes can be produced in materials that simulate the target production plastic, allowing engineers to test fit, assembly, mechanical performance, and durability in conditions close to those the final product will face.
Pre-production trials and assembly line testing use vacuum cast parts to validate processes and tooling before production begins, reducing the risk of expensive changes later.
Thermal and airflow testing is well served by polyurethane’s material consistency and the ability to produce parts with the same wall thicknesses and geometry as the intended production part.
End-use and bridge manufacturing. Vacuum casting isn’t only for prototypes. Polyurethane is robust enough for many end-use applications: elastomeric seals, overmoulded grips, complex enclosures, and low-volume production parts are all common uses, particularly where volumes don’t justify investment in production tooling.
Vacuum casting is used across sectors including medical and life sciences, automotive, aerospace and defence, electronics, and general manufacturing, wherever small quantities of high-quality parts are needed quickly.
Vacuum Casting vs. 3D Printing: Which Should You Choose?
Both processes have their place, and they’re often used together. SLA 3D printing is the most common way to produce the master pattern for vacuum casting.
3D printing is ideal when you need a one-off or a handful of parts quickly, or when each part needs to be unique. It’s also the natural choice for complex internal geometries. However, 3D printed parts are inherently anisotropic (their properties vary with build direction), and the range of simulant materials is narrower than what polyurethane casting can offer.
Vacuum casting comes into its own when you need 5, 10, 20 or 25 identical parts with consistent material properties, a production-equivalent surface finish, and the option to overmould or incorporate inserts. Per-part cost drops significantly once the mould is made, and the isotropy of cast polyurethane means mechanical performance is more predictable.
In practice, many projects use both: 3D printing for early concept validation, then vacuum casting when a pre-production batch is needed.
Vacuum Casting vs. Injection Moulding: Bridging the Gap
Injection moulding remains the process of choice for high-volume production. It’s repeatable, fast per part, and offers the widest possible material choice. But investment in a production-quality tool, along with the associated lead times, makes it unsuitable for small quantities or early-stage validation.
Vacuum casting sits between the two. It can’t match injection moulding for volume, cycle time, or the breadth of thermoplastic materials available. But it can produce parts that closely simulate injection moulded components, in terms of both appearance and performance, at a cost and lead time that makes sense when quantities are measured in tens rather than thousands.
For many products, vacuum casting serves as bridge manufacturing: producing functional parts for market testing, regulatory submission, or early customer deliveries while production tooling is being made.
Ready to start your project?
If you’re working on a prototype or low-volume production requirement and would like to discuss whether vacuum casting is the right process for your project, contact us or request a quote. You can also download our vacuum casting process and materials datasheets for detailed technical information


We’re Exhibiting at Hardware Pioneers Max 2026
5 June 2026 Comments Off on We’re Exhibiting at Hardware Pioneers Max 2026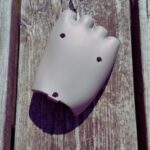
Vacuum Casting for Prototypes: What It Is, ...
30 April 2026 Comments Off on Vacuum Casting for Prototypes: What It Is, How It Works, and When to Use It
Why inspection matters in aerospace prototyping – ...
23 April 2026 Comments Off on Why inspection matters in aerospace prototyping – and what to ask your supplier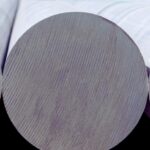
Aluminium for aerospace prototypes: choosing between 6082 ...
22 April 2026 Comments Off on Aluminium for aerospace prototypes: choosing between 6082 and 7075

Micro 3D Printing: When Standard Resolution Simply ...
20 April 2026 Comments Off on Micro 3D Printing: When Standard Resolution Simply Isn’t Enough